Weeknight Dinner: Fantasy Football Crock Pot Meatballs, A Day Late

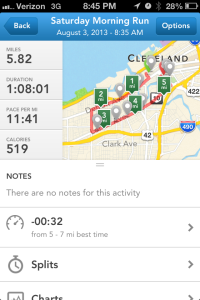
Mr. Grumpy and I had committed this weekend to running 9 miles as part of my half-marathon training. So, naturally we waited until Sunday when it was 90 degrees outside. It. Was. A. Nightmare.

We drove out to the Cleveland Towpath for our nice, sunny run. Now, mind you, we had not been outside for nearly 36 hours (remember, Downton Abbey addiction?) and were not expecting the heat. In fact, before we left, I asked Mr. Grumpy if it was cool outside and he answered, “Yeah.” Which I now realize means he wasn’t listening to me… (shocker).

I thought, it can’t be that bad trying to run 9 miles in the sun. So, we began our trek down the trail, smiling at cyclists and runners alike as they passed by. Then, the first mile passed and I thought, “Man! This is going to be so easy.”

Cut to me at 4.5 miles down the trail. Dying, practically. Most likely having a stroke from overheat. And dare I say it, my ankle hurt. I was in poor form, friends. So naturally, as any calm girl in half-marathon training would, I flung myself onto the grass and pretended to pass out. When I looked up at Mr. Grumpy to see his reaction, I was not surprised to see him hovering over me, unconcerned, hands on hips with one of his unapproving glances (like this one, but he was wearing running clothes):

IMG_1573

Also, while I was drenched in sweat (and now subsequently covered in dirt and grass), he was not even glistening. He was NOT EVEN PANTING. So, now I completely question whether or not Mr. Grumpy is an actual human. I’m sleeping with one eye open, but really. 90 degrees and you’re not even tired. You must be from another galaxy. Right???

So needless to say, we only managed 6.5 miles Sunday. But I am not giving up. And neither should you if you’re training like I am. Seriously – we’re almost there!

Anyway … I was really excited about a funny surprise I had planned for my alien boyfriend on Tuesday. Mr. Grumpy had mentioned that his Fantasy Football draft was that day, and I was so excited to make him faux Super Bowl dinner – aka, those delish crock pot meatballs that everyone knows about. I thought it would be a fun way to celebrate every girlfriend’s favorite time of the year – football season. Sigh. [INSERT FAKE SMILE HERE]

But, as you know, Mr. Grumpy and I are trying to be healthy and watch what we eat. I decided that after dealing with my meltdown on the towpath Mr. Grumpy deserved a little BBQ sauce in his life, so this was my happy compromise. I found the recipe for the meatballs on Cookin’ Canuck, and adapted it to be more BBQ-friendly. I liked the idea of using quinoa and zucchini to thicken up the meatballs. Plus, I had zucchini left over from our taco boats on Monday – awesome! In fact, I made these Monday night before I made the boats, and then just heated the meatballs up on Tuesday. It was SO NICE coming home to a crock pot meal, let me tell you. Phew.

So, what’s up with my headline? A day late, you ask? Well, yeah. His fantasy draft was actually on Monday. So I was a day late with this one – but it’s the thought that counts, right? I TRIED, OK?!?!

IMG_2877

What You’ll Need:

  • 1 lb ground turkey
  • 1/2 cup quinoa
  • 4 slices of light oatmeal bread
  • 2 eggs
  • 1/2 tsp seasoning salt
  • 1/2 tsp ground black pepper
  • 3 cloves garlic, minced
  • 1/2 white onion, grated
  • 1/2 cup of zucchini, chopped (smoosh the water out of it)
  • 1 tbsp ketchup
  • 1 tbsp Worcestershire sauce
  • 1 12 oz. jar grape jelly
  • 1 18 oz. bottle of your favorite BBQ sauce

First, preheat your oven to 350 degrees. Next, in a small saucepan, boil 1 cup of water with the 1/2 cup of quinoa mixed in. Boil on full speed for 5 minutes, then cover and remove from heat. Let it sit covered like that for 15 minutes.

In the meantime, in a mixing bowl, mix together all the ingredients EXCEPT the grape jelly and BBQ sauce. Now, because this is made out of ground turkey, it’s not going to feel as thick and sticky as the meatlballs you’re used to using ground chuck/beef. That’s ok – these will turn out really moist (hate this word), and I promise you’ll like them! Once your quinoa is done cooking, add that into the meat mixture. Stir everything together until it’s nicely combined.

On a large baking dish, spray it completely with olive oil-based cooking spray. Then, using a large melon baller, dish out your meatballs. They should be about 1.5″ large. About the size of your palm. Unless you’re a fembot and have really small hands. Then… just guess. (Eye roll)

Bake your meatballs on the mid-top rack (a few inches from the top) for 10 minutes. You want them to get nice and brown around the edges, but stay moist (really, really, really hate this word) on the inside. They won’t be completely done, but that’s ok because they’ll cook more in the crock pot.

Next, in your small crock pot, combine the grape jelly and the BBQ sauce. Once your meatballs are done cookin’, add them into your crock pot. Cook that on low for 6 hours. Stir gently every once and a while to make sure they are evenly coated. And…. enjoy! Even if you don’t have the fantasy draft binging every five minutes in the background (Mr. Grumpy, it must be your pick AGAIN!) 

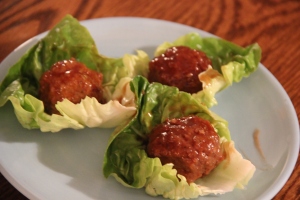
We wrapped ours up in leaves of Boston Lettuce – like lettuce wraps! 


Related articles

Mr. Grumpy Loves Doing Dishes (especially after I make Enchilada Pie)
The Dangers of Going to the West Side Market with Post-Race Hunger
Weeknight Dinner: Lemon Basil Porkchops with Creamy Potato Salad
Weekend Dinner: Lemon Rosemary Chicken with Pesto Gnocchi
Some Fun. in Cleveland
Weeknight Dinner: Salmon Patties with Cucumber-Dill Sauce
Weeknight Dinner: Zucchini Taco Boats

Snack Attack: Froyo Blueberries

This weekend, I went to see Mr. Grumpy compete in an obstacle course. He was participating in the Cleveland Corporate Challenge on behalf of his company – and if his team won, the money they raised went to a local charity of their choice. Very cool. (Hey, just because he’s grumpy doesn’t mean he doesn’t like to help people!)

So, after I did this:

IMG_2263

Wo000ohoo! It was actually about 6 miles, my GPS was a little off.

…I went to meet up with Mr. Grumpy to watch him compete. He was SUPPOSED to run at 11 a.m., and I was right on time. As I was driving over to the park, I said to myself, “Cari, maybe you should have worn sunscreen.” And then immediately dismissed myself since I would only be at the park for 30 minutes.

Five hours later, we were STILL at the park. And I was pretty badly sunburned. So sunburned in fact that I am now a blister queen. It’s pretty bad. I took a picture of myself so you could see how red I am:

IMG_2265

I thought it was time the world saw this. This is me. At my first dance recital. I was a sweet ass lobster. This is basically what my body looks like right now. Minus the tinsel. (Thanks for that awesome lipstick, Mom)

So, Monday evening, instead of meeting up with a dear friend and watching the Indians play the Tigers, I sadly went home and lathered aloe on my back for the entire evening and stocked up on Motrin. I kept asking Mr. Grumpy to do me favors but he was not very pleased with my neediness. He claimed he couldn’t help me until the dishes were done, which ended up taking him 2 hours (no, this is not an exaggeration).

I needed a sweet treat that made me cool on the inside, even though my skin felt like a built-in heater. But, as you know I’m trying to not waste all the calories I lose by running by eating ice cream and drinking beer. So, I made these babies on Sunday night, and busted them out on Monday. It was the perfect answer to my troubles. So perfect, I wanted to just place them on my sunburn – but they were way too tasty to waste.

Froyo Bluberries – the ice cream alternative
IMG_2752

What You’ll Need:

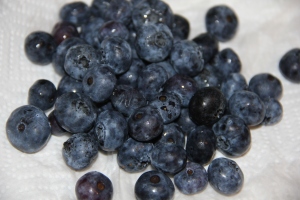
Sorry, we couldn’t get a really good picture of the froyo blueberries. Mostly because they were in my belly. Just imagine these, but white. And cold. The first image doesn’t really do them justice.

First, make sure after you rinse your bluberries you dry them completely. Otherwise, the yogurt won’t stick to them. Then, line a baking sheet with parchment paper. Next, one-by-one, roll each blueberry in the vanilla yogurt, so they are completely coated.

Place gently on the baking sheet. Once the blueberries are all covered and on the baking sheet, gently cover with plastic wrap. Place in the freezer overnight. Once the yogurt is set, you can transfer them into a Ziplock bag or a freezer-safe container. But don’t do it like I did and put it in the Ziplock BEFORE the yogurt is dry. You’ll have yourself a chunk of blueberry yogurt ice blocks.

Related articles

Some Fun. in Cleveland
Mr. Grumpy Loves Doing Dishes (especially after I make Enchilada Pie)
Happy Fourth of July, ‘Mericuh! (Flag Cake & DIY Sparkler Favors)
The Dangers of Going to the West Side Market with Post-Race Hunger

Sunday Snack Time and the new addition to our family…

Did your heart stop when you read my header up there? Well DO NOT FRET, my friends. Mr. G and I did not add tiny little grumpies (save us all) to our apartment. We also did not buy a puppy… (which makes me grumpy). However, when Suzie Q and DS visited this weekend, and Suzie Q asked to see our babies … (Yep, this happened) the look on Mr. G's face was pretty priceless. And then he proceeded to hide underneath this blanket on the couch… while I looked in HORROR at Susan wondering what on earth possessed her to think we had babies. Yikes… 


IMG_2454

You should know this is also his safe place when we have to talk about anything gushy… like love. I prefer to hide under there when we have to talk about gushy things like… paying the bills.

What Suzie Q was ACTUALLY referring to was our new washer and dryer. She had already named our new washer and dryer but I was so in shock by them being referred to as our babies, I really have no idea what they were being called.


IMG_7934

I'm going to call them Queen Frostine and Gramma Nutt. Why – Cari, are those Candyland characters, you ask? Yes, readers. Yes they are. Why would I name my washer and dryer after Candyland characters? Well, we discovered that when the washer and dryer are done with a load, they sing this AMAZINGLY cheery song, as if we were traveling into the Candy Castle, and a pack of Lollipop kids were welcoming us into the world of clean clothes. 

Our washer and dryer arrived when I was at Camp Blogaway, and this song was of course the first thing Mr. G mentioned. He told me it was just too much for him to handle, so he had turned it off. When I came home and heard it for myself, I felt pure joy. Therefore, I made a rule that it must stay on. Mr G doesn't really take my rules seriously… we've been battling it out ever since (i.e., I put a load in, he goes and turns off the song. I turn it back on with only 1 minute left on the load, and when the song plays Mr. G makes one of his notorious Grumpy faces). It's been quite fun. You're welcome to come over any time and do a load or two, if you promise to keep the song on. 

So, meet our new family members. Tadahhh! Now, let's eat something because I'm sure that whole thing about babies made you about as sweaty and clammy as it made me. 

Whenever I'm stressed, I like to eat comfort food. Well, sometimes comfort food is sorta fatty. And by sorta – I mean there is really no way to make a fried bologna sandwich without clogging a few pores and arteries. So, when I discovered I had a few zucchinis in my fridge, and noticed that I really should use them up, I decided to make zucchini chips – i.e., mini fried zucchini. 

I received this amazing OXO vegetable slicer at Camp Blogaway, and my life will probably never be the same. So, decided this would be the opportunity to try it out and see if I could use it without slicing off one of my fingers. 

Sunday Snack Time: Zucchini Chips

IMG_2464

What You'll Need:

  • 2 small zucchini
  • 2 cups flour
  • 2 cups Italian bread crumbs
  • 2 tbsp Lemon and Pepper Seasoning (McCormick's)
  • 1 cup of milk
  • OXO vegetable slicer or a very precise knife
  • 1 cup of canola oil

First, take your handheld veggie slicer and slice your zucchini on setting 2. If you do not have one of these, you should seriously invest, people. I'm not kidding. Your life will change. You'll have time to do things you never imagined you could do. Like … vacuum. (No, I didn't vacuum, but I had TIME to). If you do not invest, that's cool. I won't be pushy. Just take your zucchini and make really thin coin-shaped slices. 


IMG_2457

Next, pour your milk into one bowl. In an additional bowl, combine the flour with the Lemon and Pepper Seasoning. If you don't have that either, no biggie. Just add about 1 tbsp lemon zest to about 1 tsp of pepper. Next, in a third bowl, place your Italian bread crumbs. 

First, toss your zucchini pieces in the flour, making sure each slices is evenly coated with flour. Then, dip them into the milk. Then, place them in the third bowl to cover with breadcrumbs. If you aren't a fan of the milk, I should mention you could also use an egg. 


IMG_2461

Now that your zucchinis are all covered with breadcrumbs, heat a deep pan (I used my wok) over medium-high heat with 1/4 cup of canola oil. Let the oil get hot. I had my stove on about one to two notches over medium, if that helps. Then, slowly add in your zucchini pieces, one at a time. Cook each for about 30 seconds on each side until a light golden brown. Remove from oil and place on a plate on top of a paper towel. Repeat this until all your zucchini pieces are fried, adding more oil as you go (you'll likely end up using about a cup). 


IMG_2463You can eat them all right away (we dipped ours in the Cucumber Dill Feta dip I found at the grocery), or you can store them in your fridge in a tupperware container and munch on them as needed. 

This will get rid of your Sunday munchies (which we definitely had today). 

Disclaimer: I was provided the OXO handheld slicer as part of my involvement at Camp Blogaway. The opinions are my own, though. Yes, I really did love it. And yes, I still have all my fingers. No, they did not ask me to review it. Phew. Got through that disclaimer stuff…

Weeknight Dinner: Seared Tuna Avocado Salsa Salad

Mr. Grumpy was lucky enough to go to the Indians game Monday night, and watch from his company's super swanky suite which comes with free food… while I sat at home nursing my sore throat and trying to eat the first solid food of the day. But, I couldn't help but take advantage of the fact that he was gone, so I got to eat seafood. I checked in on the one seafood I knew of that would slide easily down my sore throat – seared tuna. YUM. 

I adapted this recipe again…from Cooking Light's May issue. Lord. I know. I am literally making every recipe in this issue. They probably don't like me sharing all these recipes, but alas – I just can't not share them. They're so good.

IMG_2143

What You'll Need:

  • 1/2 cup of grape tomatoes, cut into quarters
  • 1/2 cup of red onions, sliced not chopped (I cut it into quarters, and cut really thin slices)
  • 1 1/2 tbsp cilantro
  • Juice from 1/2 lime
  • 1/4 tsp salt
  • 1/4 tsp black pepper
  • 1 avocado, peeled and diced
  • 1 garlic clove, chopped into small pieces
  • 1/2 jalapeno pepper, take out all the seeds, and cut into small pieces 
  • 2 tbsp low-sodium soy sauce
  • 2 tbsp light brown sugar
  • 2 tuna steaks (I bought mine frozen from the seafood counter –  they were Yellowfish Tuna steaks … I think, and just soaked them in plastic in a pot full of hot water until they were thawed. This keeps them super fresh until you're ready to eat)

First, combine all the ingredients together in a small bowl, except for the soy sauce, brown sugar and the tuna steaks. Next, in a small mixing bowl, combine the soy sauce and the brown sugar. Stir that until the sugar is dissolved.

Next, take a grill pan (I finally figured out what that was called!!) and heat it over the stove on high heat. Spray it with cooking spray while it's heating. Next, drizzle half of the soy sauce mixture on your tuna steaks, on both sides. Reserve the rest of the soy sauce for when everything is done. 

Now, place your tuna steaks on your grill pan and cook on each side about 1 minute and 45 seconds. Be careful because you really don't want to overcook the tuna – it will get hard and gross, and the Chopped judges will get mad at you and make you feel like a super idiot. I had never made seared tuna before, so I erred on the side of caution and did 1 minute and 30 seconds on each side, checked the tuna, and then cooked and additional 15 seconds more on each side. You definitely don't want to turn down your pan because you really want the edge of your tuna to be crusty and yummy. 

Cut up the tuna, with the grain. Place about 1/2 of the salad you made on your plate, and put the tuna slices on top of it. Drizzle the remaining soy sauce evenly over both steaks on each plate (I made one plate and saved one in a tupperware for lunch later this week), and toss so everything is coated. And enjoy!! 

Weeknight Dinner: Peeta’s Cheesy Goodness, I’ve Been Starving My Whole Life Until You Came Along Buns…and Julie’s Produce Aisle Skillet.

Let me start by telling you that my sister Julie (one of my most avid readers) is a vegetarian. She pointed out, quite rightly, that I have not been providing any vegetarian recipes, or vegetarian substitutes for my recipes. Well, she's right. I'll let you in on a little secret – it's because we eat meat at every meal. Julie challenged me to an all vegetarian night, and by golly – we did it. Now, if we weren't allowed to eat meat, you can bet your tooshey that we were going to be making up for it by piling on the cheese. So, Julie – this one's for you!

Weeknight Dinner: Peeta's Cheesy Goodness, I've Been Starving My Whole Life Until You Came Along Buns…and Julie's Produce Aisle Skillet.  

IMG_1959

Start with the buns. They'll cook while you're doing the dinner part… Now, there will be no spoiler alerts in this blog, so for those who are reading the Hunger Games or shamelessly watching all the movies and pretending like you read the book (you know who you are, losers), then you can read easy. I'm just going to talk about how I managed to make Peeta's Cheesy Goodness, I've Been Starving My Whole Life Until You Came Along Buns. Now, if I were Katniss, and I had been eating nothing but goat's milk and fawn for like… 18 years, and this sexy-ish dude handed me one of these buns… Yeah, he'd be my boyfriend in like a second. Unfortunately Katniss doesn't always do what we think she should do, so I guess Peeta's going to have to stuff more cheese in these babies or do SOMETHING to get through to her.. I digress.

hunger games meme forever alone

I found this recipe on Pinterest, which originated from a blog called Yammie's Noshery. Honestly, I didn't really change much, but just enough to make homemade bread Cari-proof, and I cut it in half (which I regretted later because I could have eaten all 20). 

What You'll Need (for the buns):

  • 1/2 cup of warm water from the kitchen sink
  • 1 packet of dry active yeast
  • 1 tbs of sugar
  • 1/2 tsp garlic powder
  • 1/8 cup melted butter
  • 1/8 cup olive oil
  • 1 1/2 cups all-purpose flour
  • 1 tsp salt
  • 8 oz. part-skim/low fat mozzarella cheese
  • 1/4 cup low fat colby jack cheese
  • 1/4 cup parmesan cheese 
  • A little bit of melted butter, mixed with 1/4 tsp garlic powder and 1/2 tbs fresh parsley chopped

Mix together water and yeast in a bowl, and let it set for 5 minutes. You will start smelling the yeast when it has been sitting for a while, that's a good sign (I think). Add in the sugar, garlic powder, melted butter and oil. Add the flour slowly – 1/4 cup at a time – and the salt. I mixed mine in my stand mixer with the dough hook. If you do not have a stand mixer, I'm so sorry. You're going to have to knead that dough by hand for 10 minutes… Knead the dough for 10 minutes.

In the meantime, grease a small bowl and wet a cloth. Then, form the dough into a ball, and place into the greased bowl. Cover with a wet cloth for 30 minutes to let it rise! 

(While my dough was rising, I cooked the Produce Aisle Skillet so they were all ready at once!). 

Preheat the oven to 375. Get out a large muffin pan (the kind that only has six muffins). Spray each muffin bump with non-stick cooking spray (I feel creeped out by this stuff, but it will really be necessary, so bare with me). Separate the dough into little balls – I made five, but you can make your rolls as big or small as you want. Smoosh it into a flat circle, and place a 3/4" size of mozzarella cheese into the middle. Pinch it closed, and roll it back into a ball. Do this until all your dough is gone – I placed each roll into a muffin bump in my pan, but you could really cook them on a cookie sheet and that would be fine. I was concerned the cheese would go all over, but it did not. Mostly because I'm an excellent pincher. 

Sprinkle each roll with colby jack cheese and parmesan. Bake in the oven for 14-15 minutes. The bread will not be super brown, but when you push on it, you'll know if it's done if the bread is soft in the middle and crispy on the top. Brush each roll with the butter mixture (butter, parsley and garlic powder). And fight everyone off because you're going to want to eat every single one of these and not share them with Mr. Grumpy at all. He will get angry and steal one of your rolls. I imagine this is exactly how Katniss and Peeta felt, and am not surprised she was so moody around him.

Julie's Produce Aisle Skillet

Julie, I accepted your challenge and had a meat-free dinner. I thought you'd be proud. But, because Mr. Grumpy and I do work out (as much as we can), protein is very, very important to our diets. So, this Produce Aisle Skillet was the perfect answer. Quinoa, veggies, feta cheese (got the cheese in there, see?) and a lemon honey vinaigrette? Delicious, and vegetarian friendly!

IMG_1954
 I adapted this recipe from one of my favorite blogs – Iowa Girl Eats

What You'll Need:

  • 1 3/4 cups low-sodium vegetable stock (or broth is fine) – we use the organic kind. Full disclosure – I actually used chicken stock. Sorry Julie. I forgot I was being a vegetarian, but I thought you'd appreciate my honesty. That was tricky! 
  • 1 cup quinoa: rinse it so that it is sticky when you're done cooking it
  • 1 tbsp olive oil
  • 4 cloves garlic, chopped
  • 1/2 small zucchini, cut into small, quarter pieces 
  • 1/2 small yellow squash, cut into small, quarter pieces
  • 1 can of Mexicorn, drained
  • 1/2 white onion, chopped
  • 1 roma tomato, diced
  • 1/2 cup feta
  • 2 tbsp chopped fresh basil
  • 1 lemon's worth of lemon zest (about 1 1/2 tbsp)
  • 1/2 lemon's worth of lemon juice (about 2 tbsp)
  • 1 1/2 tbsp honey
  • 1 garlic clove, minced
  • 1/2 tsp salt
  • 1/4 tsp pepper

First, prepare all your veggies. It took me longer to chop all the vegetables than it did to actually make the dish. Next, bring the stock to a boil in a saucepan. Add the quinoa, and cover the saucepan with a lid. Turn down the heat to low, and cook 25 minutes. DO NOT PEAK AT THE QUINOA. I get real upset when Mr. Grumpy cheats and peaks. The point is that the liquid is absorbed, and that won't happen if you keep looking at it. 

Meanwhile, combine the lemon zest, lemon juice, honey, 1 garlic clove, salt and pepper in a dressing jar (I use little tiny mason jars) and shake it.

Heat 1 tbsp olive oil in a pan over medium heat. Use one of your larger pans because the skillet is the most massive skillet you've ever seen (but makes THE BEST leftovers). Add garlic and onion and saute until translucent. Then, add zucchini, squash, and corn. Season with salt and pepper to taste, and saute it for 6 minutes. Add cooked quinoa and half the honey lemon vinaigrette, and then stir. Cook for a few more minutes — I did around 2 more minutes to make sure my veggies were all cooked nicely.

Add remaining vinaigrette, tomatoes, feta cheese and basil. Stir, and let it cool before serving (this is a good time to brush the butter on your Peeta Buns!!).