Weeknight Dinner: Captain America’s Super Punch Salad

Well, as many of you know, Captain America has been causing QUITE the ruckus here in the CLE with his filming and such. Don't get me wrong… any time Chris Evans wants to stop by the CLE and snuggle with me, I'm totally down for that. While that will likely not happen during his trip to the CLE, he has opened my eyes to the large amounts of security those movie sets are packed with.

As many of you ALSO know, I am now walking to work when I am able to. On Tuesday of last week, it look me 30 minutes to get to work on foot. A normally 12 minute walk… And during this 30 minutes, I managed to discover an underground tunnel in CLE (which I was told by a security guard to go into when I was walking toward the set), and land right pat in the middle of Superior Ave. Right smack in the middle of a car crash scene. And smack DAB into the arms of a very angry security guard who then grabbed my arm and dragged me across the street to my office building. 

Sorry, guys (I'm actually not). Just trying to get to work here. And if that means that you need to set up a trailer for me next to Chris Evans equipped with Wifi so I don't disturb your filming again, than sobeit. I would gladly stake out in a movie star trailer. Just offering. 

Anyway, all this Captain America talk in the CLE has reminded me that I, unlike Chris Evans, have a Hilton Head vacation coming up in just two weeks time. And I, UNLIKE Chris Evans, have about 10 pounds to lose. For your reference, this is why Chris Evans isn't in the same boat as me:

Great. 

So, I decided to try my luck at the Special K diet. What especially makes me happy about this diet is that I can eat a normal dinner every night, but still have the potential to lose six pounds. Basically all I have to do is eat nothing but cereal for 14 days, and I will look like this:

SO, for dinner tonight, I made this super punched Captain America salad – what I imagine Chris Evans is probably eating RIGHT NOW. Although, he's probably at some super fancy restaurant right down the street and I have no idea he's so close (hello, Blue Point Grille? Is Chris Evans there?).

For this salad, I used this new type of rice I learned about at Camp Blogaway called Lundberg. It's a gluten-free short grain brown rice, and has such a nice texture and flavor that I may be sold. Although, I'm starting to think I'm a bit too easy here… I received a free sample, and was challenged to submit my own summer salad recipe on Pinterest. If you vote for my recipe by liking it on Pinterest, I could win a $100 Whole Foods gift card. So, do a gal a favor and go "like" my post (linked here). Thanks…


IMG_2474

What You'll Need:

  • 1/2 cup Lundberg Short Grain Brown Rice
  • 1 cup organic chicken stock
  • 1/2 pound uncooked, peeled and deveined shrimp (I did it!!)
  • 1 can black beans, drained and rinsed
  • 2 ears of corn (peel off the leaves and the hair…)
  • 1 avocado
  • 1 orange
  • 2 tbsp cilantro, chopped
  • 3 lemons
  • 1/4 red onion, chopped
  • 1/4 cup feta cheese
  • 1/4 cup cherry tomatoes, sliced in half, and then half again (fourths?)
  • 1/2 cup of olive oil, divided
  • 6 cloves of garlic
  • 1/2 tsp coriander
  • 1/2 tsp ground cumin
  • 1/2 tsp mustard seeds
  • 1 tsp lemon pepper seasoning (I use this for everything now, basically)
  • 2 tsp honey, divided
  • 1/4 tsp sugar
  • 1/2 tsp garlic salt
  • 1/4 tsp pepper
  • salt to taste

The night before you want to marinate your shrimp. If you forget, it's no big deal. Just marinate them for 30 minutes prior to cooking them covered, in a bowl on the countertop. To make the marinade, combine the juice from one lemon, 1 tsp honey, salt to taste, 1 tsp lemon pepper seasoning, 4 cloves of garlic, coriander, cumin, mustard seeds and 1/4 cup of olive oil in a food processor. Combine until it's a little creamy and all mixed together. Place your shrimp in a bowl with the marinade and set aside (or if you're marinating overnight, place it covered back in the fridge). 

Combine your rice and chicken stock in a medium-sized pan. Place on your stove over medium-high heat. Once it boils, stir one time, and then turn your stove to low. Cover and let it simmer for 50 minutes.

Heat your grill. Take your corn and drizzle it lightly with olive oil, and salt and pepper to taste. Grill your corn, slowly rotating it until each side is cooked and lightly charred. Keep your grill heated for the shrimp cookin'. Once you have about 10 minutes left on your rice, grill your shrimp. We put them on kabobs. You're going to notice these babies cook fast – probably a few minutes per side. You'll know they're done when they turn a light pinkish color, and get a bit firmer (but not TOO firm!). 

Peel and chop your avocado, and do the same for your orange. Combine in a large bowl your avocado, orange, black beans, cilantro, tomato and red onion. Cut the kernels from the corn, and add that to your bowl. Add the shrimp and feta cheese. Once your rice is done cooking, add that into the bowl as well.

Next, in a separate bowl, combine the juice of 2 lemons, 1 tsp of honey, salt and pepper to taste, 1/4 cup of olive oil and garlic salt. Whisk that together. Pour it over your salad, and mix. 

Enjoy!! (This went great with the fried zucchini chips!).

This is actually really similar to a super yummy salsa that Suzie Q and Erhead (my sister) make each summer. I just added in some fruit and my favorite marinade that I changed slightly from the Feed Zone Cookbook. This is such a great cookbook because it's packed with all the things you need to keep up your energy when you're being super active. 

NOW, don't forget to VOTE FOR ME HERE by liking my pin!!! 

Disclaimer, I received a package of Lundberg rice for free as part of my participation in Camp Blogaway. Again, my opinions are my own. You should also know that I got distracted and burned the first batch of rice. Totally not Lundberg's fault. Unless they paid to have the Real Housewives of New Jersey run on loop all day… 

Sunday Snack Time and the new addition to our family…

Did your heart stop when you read my header up there? Well DO NOT FRET, my friends. Mr. G and I did not add tiny little grumpies (save us all) to our apartment. We also did not buy a puppy… (which makes me grumpy). However, when Suzie Q and DS visited this weekend, and Suzie Q asked to see our babies … (Yep, this happened) the look on Mr. G's face was pretty priceless. And then he proceeded to hide underneath this blanket on the couch… while I looked in HORROR at Susan wondering what on earth possessed her to think we had babies. Yikes… 


IMG_2454

You should know this is also his safe place when we have to talk about anything gushy… like love. I prefer to hide under there when we have to talk about gushy things like… paying the bills.

What Suzie Q was ACTUALLY referring to was our new washer and dryer. She had already named our new washer and dryer but I was so in shock by them being referred to as our babies, I really have no idea what they were being called.


IMG_7934

I'm going to call them Queen Frostine and Gramma Nutt. Why – Cari, are those Candyland characters, you ask? Yes, readers. Yes they are. Why would I name my washer and dryer after Candyland characters? Well, we discovered that when the washer and dryer are done with a load, they sing this AMAZINGLY cheery song, as if we were traveling into the Candy Castle, and a pack of Lollipop kids were welcoming us into the world of clean clothes. 

Our washer and dryer arrived when I was at Camp Blogaway, and this song was of course the first thing Mr. G mentioned. He told me it was just too much for him to handle, so he had turned it off. When I came home and heard it for myself, I felt pure joy. Therefore, I made a rule that it must stay on. Mr G doesn't really take my rules seriously… we've been battling it out ever since (i.e., I put a load in, he goes and turns off the song. I turn it back on with only 1 minute left on the load, and when the song plays Mr. G makes one of his notorious Grumpy faces). It's been quite fun. You're welcome to come over any time and do a load or two, if you promise to keep the song on. 

So, meet our new family members. Tadahhh! Now, let's eat something because I'm sure that whole thing about babies made you about as sweaty and clammy as it made me. 

Whenever I'm stressed, I like to eat comfort food. Well, sometimes comfort food is sorta fatty. And by sorta – I mean there is really no way to make a fried bologna sandwich without clogging a few pores and arteries. So, when I discovered I had a few zucchinis in my fridge, and noticed that I really should use them up, I decided to make zucchini chips – i.e., mini fried zucchini. 

I received this amazing OXO vegetable slicer at Camp Blogaway, and my life will probably never be the same. So, decided this would be the opportunity to try it out and see if I could use it without slicing off one of my fingers. 

Sunday Snack Time: Zucchini Chips

IMG_2464

What You'll Need:

  • 2 small zucchini
  • 2 cups flour
  • 2 cups Italian bread crumbs
  • 2 tbsp Lemon and Pepper Seasoning (McCormick's)
  • 1 cup of milk
  • OXO vegetable slicer or a very precise knife
  • 1 cup of canola oil

First, take your handheld veggie slicer and slice your zucchini on setting 2. If you do not have one of these, you should seriously invest, people. I'm not kidding. Your life will change. You'll have time to do things you never imagined you could do. Like … vacuum. (No, I didn't vacuum, but I had TIME to). If you do not invest, that's cool. I won't be pushy. Just take your zucchini and make really thin coin-shaped slices. 


IMG_2457

Next, pour your milk into one bowl. In an additional bowl, combine the flour with the Lemon and Pepper Seasoning. If you don't have that either, no biggie. Just add about 1 tbsp lemon zest to about 1 tsp of pepper. Next, in a third bowl, place your Italian bread crumbs. 

First, toss your zucchini pieces in the flour, making sure each slices is evenly coated with flour. Then, dip them into the milk. Then, place them in the third bowl to cover with breadcrumbs. If you aren't a fan of the milk, I should mention you could also use an egg. 


IMG_2461

Now that your zucchinis are all covered with breadcrumbs, heat a deep pan (I used my wok) over medium-high heat with 1/4 cup of canola oil. Let the oil get hot. I had my stove on about one to two notches over medium, if that helps. Then, slowly add in your zucchini pieces, one at a time. Cook each for about 30 seconds on each side until a light golden brown. Remove from oil and place on a plate on top of a paper towel. Repeat this until all your zucchini pieces are fried, adding more oil as you go (you'll likely end up using about a cup). 


IMG_2463You can eat them all right away (we dipped ours in the Cucumber Dill Feta dip I found at the grocery), or you can store them in your fridge in a tupperware container and munch on them as needed. 

This will get rid of your Sunday munchies (which we definitely had today). 

Disclaimer: I was provided the OXO handheld slicer as part of my involvement at Camp Blogaway. The opinions are my own, though. Yes, I really did love it. And yes, I still have all my fingers. No, they did not ask me to review it. Phew. Got through that disclaimer stuff…

Cari Goes to Camp (and a spicy pesto pasta, if the camping thing didn’t get your attention…)

I had the best weekend of my life over Memorial Day – a client of mine sent me to Camp Blogaway, the premiere conference for FOOD and RECIPE BLOGGERS. Um, hello. I'm totally there, clients. Maybe they were concerned I'd be working all weekend? Me? I was concerned that Camp Blogaway would end too soon. Or that my plane crew would disappear right before I board (this happens too much, no?) and I wouldn't make it to Angelus Oaks, California (elevation: 7,000 ft.), and would miss Camp Blogaway and never, ever, ever recover mentally. 

Camp B
(This is where Camp Blogaway is)… No biggie.

After three days of bonding with my roomie Dee, sleeping on the top bunk (yes, this happened) in a sleeping bag (yes, this happened), hearing from some of the BEST food and recipe bloggers with tips and advice, learning from cooking celebrities, food stylists, and of course making new besties for life over bottles of wine (Camp was sponsored by a vineyard…), I couldn't believe it was time to come home.

I told Mr. Grumpy I missed him as much as I could. But listen. It was a little hard to not be selfish when I was doing Zumba at 6:30 a.m. on the mountaintop with my new fave Zumba instructor, Alyson (from Mojitos and Florentine), and then spending the rest of my day with people just like me (maybe a little less loud than me, but still). Wait – what… you don't believe me that I was up at 6:30 a.m. to do Zumba? You better believe it people. BETTER BELIEVE IT. 

IMG_2232
(Three faves: Alyson on the left, Amy from Vine Sleuth in the middle, and the ever awesome Chung-Ah from Damn Delicious on the right). Amy knew a lot about wine. I felt like when I left Camp B that I also knew a lot about wine since I had tasted so much. 

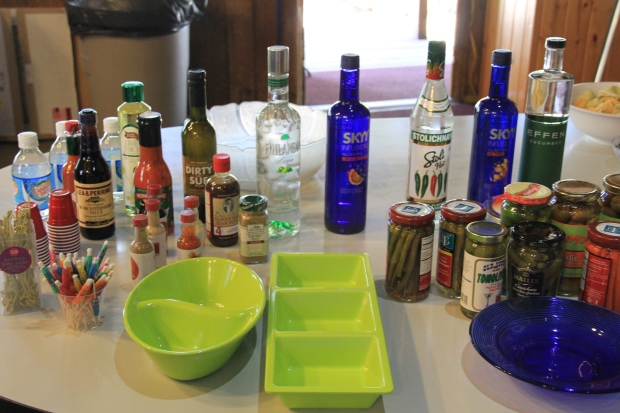
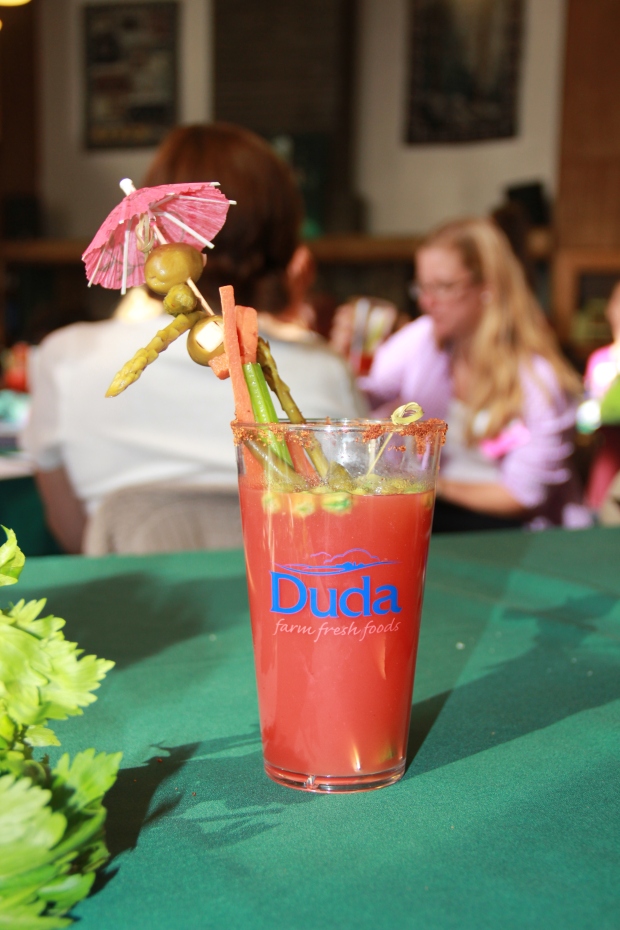
We chased our wine down with Bloody Marys, which were… interesting. Mine was not so bad – it actually won a contest (no big deal). 

IMG_2206

IMG_2230
(The judges didn't actually TASTE my Bloody Mary… so, just know it was really a group effort on the looks – aka, Bloody Mary decor – with my tablemates)… 

I had a bit of a conniption when I finally met Jessica Fisher (Good Cheap Eats blogger) and her cohort Stephanie O'Dea (A Year of Slow Cooking) within the first hour I arrived at camp. You would have thought I was meeting the president. I'd been a big fan of both of their blogs for… well.. like ever. And acted like a crazed teenage fan – out of breath, unable to express my gratitude for their amazing recipes and ability to stay organized and calm throughout their daily lives despite a glam life full of blogging and family-ing. It was rather embarrassing, and I promised myself to NEVER reveal the inner geek within me like that ever again. (Shameful). (Not as shameful as this picture of me…)

IMG_2259

Anyway, now that you're completely jealous… I got the chance to talk with one of the bloggers – Christina of Christina's Cucina (an amazing Italian-food inspired blog) and learned all about this new brand of pasta that she swears by. I did receive a free box of it at Camp, but I also wanted to try a recipe using orrechiette pasta, so ended up hiking to the supermarket when I returned to the CLE (a new woman) to test it for real. The brand is called De Cecco, and seriously. This pasta is good. It's like Mr. Grumpy's mom made it from scratch and then fed it to you good. Get it. Try it. You won't regret it. Listen people. I'm having a foodie moment, so bare with me. Thanks…

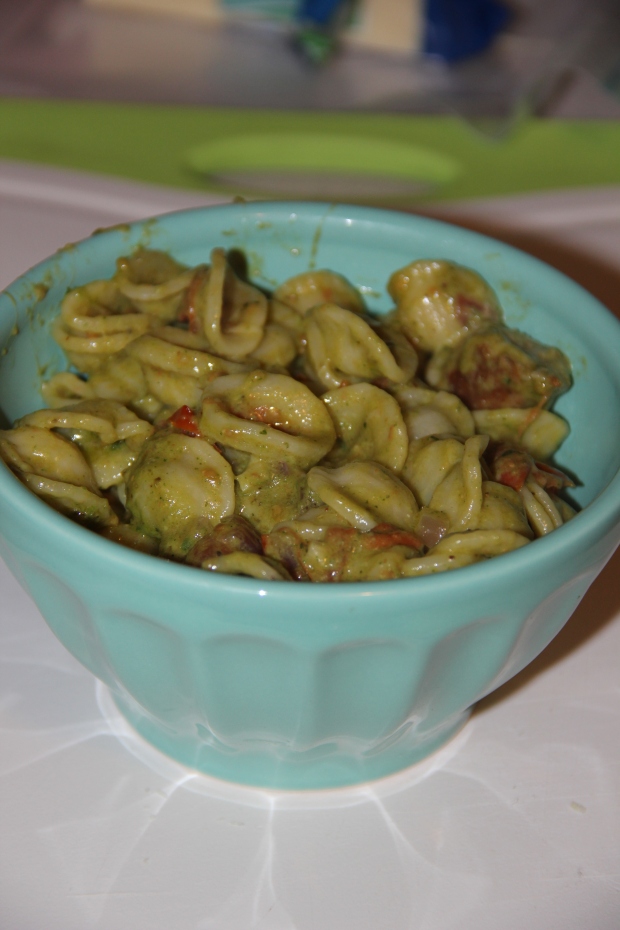
So, I embarked on making pesto for the first time ever. I wanted to impress Mr. Grumpy with all my amazing new skillz (with a z) that I learned at Camp Blogaway, but realized I had ZERO idea how to make pesto. So in true Cari Jeanne form, I called Suzie Q for a recipe and her advice was just to throw in everything until it tasted good (no measurements, Mom? What. A. Shocker.). So… (say it with me)… I IMPROVISED and came up with my own recipe. And this is what was created:

Cari's Spicy Pesto Summertime Pasta

IMG_2437
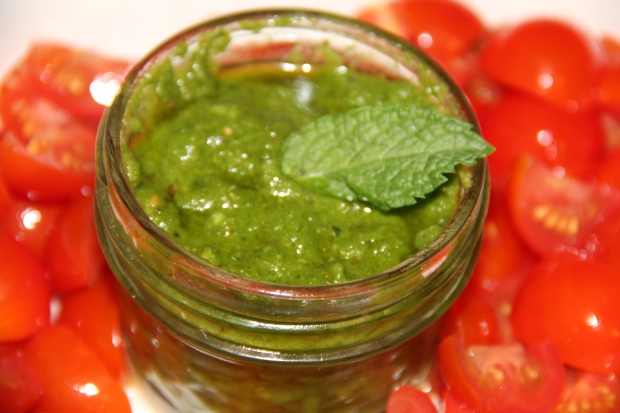
(Mr Grumpy to Cari: "Wow, look at that amazing food styling!" Cari to Mr. Grumpy: "I know, amazing right? Camp Blogaway really changed my life.") This conversation never happened. I believe his exact words were… "When is dinner going to be ready? And why the hell are you putting our tomatoes around that jar?" The pesto recipe makes two of these jars. Freeze one of them if you want… 

IMG_2449
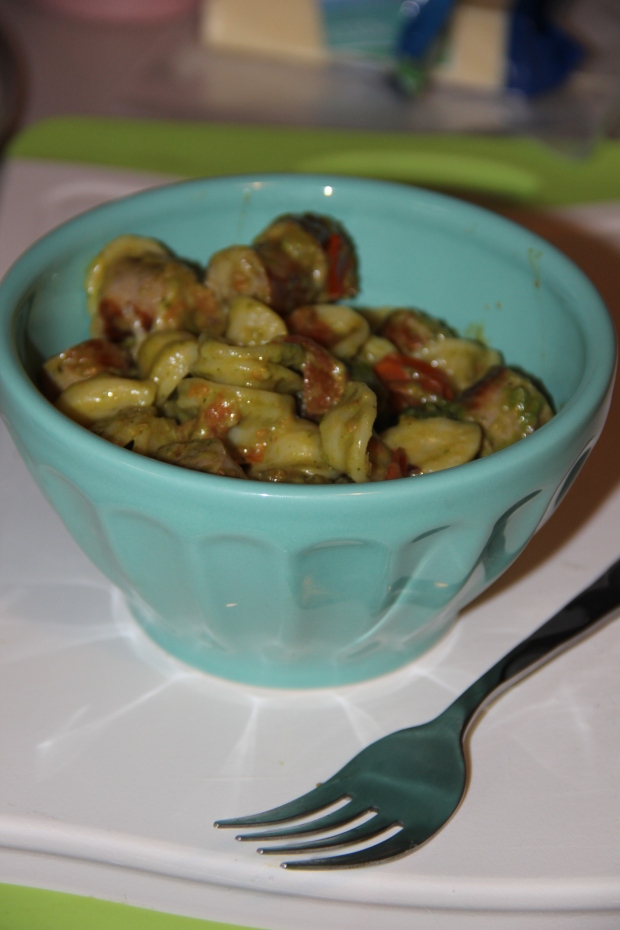
Laaaa…. tadaahhhhhh! 

Ok, here's what you'll need…

For Cari's Spicy Pesto:

  • 1 cup of fresh basil, super packed in the cup (or 1 1/3 cups if you don't smoosh it in there a lot)
  • 1 tbsp fresh mint (Suzie Q told me to throw in all my herbs… so there)
  • 1/4 jalapeno
  • 3 medium cloves of garlic
  • 1/3 cup pine nuts
  • 1/8 tsp sea salt
  • 1/3 cup Parmesan cheese
  • 1/4 tsp lemon and pepper seasoning (McCormick's)
  • 3/4 tsp dried rosemary
  • 1/3 tsp garlic salt
  • 1/4 tsp dried basil
  • 3/4 cup of olive oil

Mix all together in a food processor or blender until it's smooth. If it's a little chunky, add a bit more olive oil. I started by putting in 1/4 cup of olive oil, and then added more whilst blending. It was all very fancy and scientific (…not really). 

For the Pasta:

  • 1 jar (about 1/3 cup) of Cari's awesome pesto
  • 1/2 box of De Cecco orrechiette pasta
  • 1 cup of cherry tomatoes, cut into fourths
  • 1/2 red onion, chopped
  • 2 cloves of garlic
  • 1 tbsp olive oil
  • 1/4 cup of mozzarella cheese, freshly grated (or be like everyone else in America and buy it already shredded. You're welcome)
  • 1/2 lb three cheese italian sausage (uncooked)

First, get your water boiling. Next, in a small pan add 1 tbsp olive oil and heat over medium-high heat. Add the sausage and cook fully. Remove it from the pan, but don't drain your pan. Have Mr. Grumpy cut your sausage into slices because it's super messy AND he wasn't really doing anything but watching that ridiculous show about monsters in rivers… Thanks for THAT one Discovery Channel. 

While he's doing that, add your pasta in the boiling water, and cook as the package directs. Then, add your onions and garlic in the pan you cooked your sausage in. Let those cook over medium heat until the onions are translucent and you can smell the garlic. It will take about 3 minutes. Add in the tomatoes, and turn your heat down to medium-low heat. Cook for an additional minute. Add in the sausage and let that cook in the pan for one more minute.

Drain your pasta and add it to the hot pan with the sausage mixture. Add in the pesto and mozzarella, and stir until it's all mixed. The mozzarella will melt and it will be nice and creamy when it mixes with the pesto. Seriously. Delicious.

I really liked the pasta too – it had such a nice flavor (like Mr. Grumpy's mom's homemade pasta). I would definitely recommend it. Wayyyyyyy better than that brown stuff (whole grain pasta) – WHOA, I just turned into Mr. Grumpy for a minute. Actually, the pasta is really not that bad for you. And don't you deserve some real good Italian cooking every once in a while? UM> Hell yeah you do. 

IMG_2446