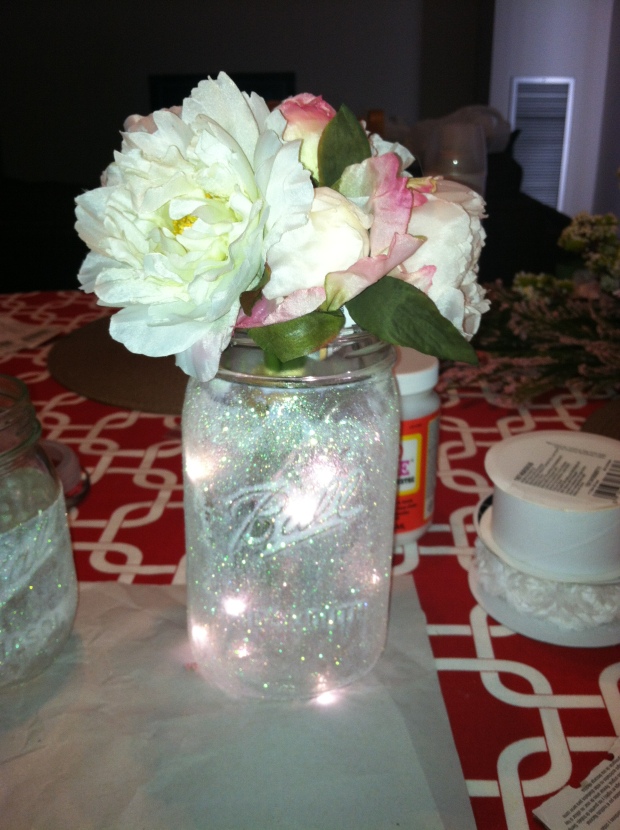
Today, my friend Robin and I had the very first (and first of many!) installment of Crafting with Cari – we were working on the centerpieces for her wedding! We saw these glittery wine bottles on Pinterest, and she had the amazing idea to glitterize Mason jars. Seriously, this is the easiest craft project you'll ever do, and the best craft project you'll ever do as well. It. Was. Awesome.
Now, let me preface this by telling you that I am TERRIBLE at crafts. In fact, I got a B- in Middle School Art class. And I do NOT get B's, so that was a big deal. I got docked major points for not cleaning up my art station, and also the fact that I rushed through all my art projects so that the vases I was pottery-ing always fell apart. My art teacher often had to supervise me… it's very hard to do artsy things whilst talking and flirting with all the boys…
But, Robin put her faith in me, and put my crafting to the test, and we DID IT! And again, I say, these are awesome:

All you need is:
- A jar of Modge Podge
- A jar of glitter (we used white)
- A mason jar
- A paint brush
- Acrylic sealant (it's by the spray paint)
- Masking tape
First, make sure your Mason jar is clean and completely dry. Then, tape the part where the lid usually goes. Pour out the glitter and spread evenly upon some parchment paper. Paint the outside of the Mason jar with Modge Podge (make sure it's really even, because whereever there is a glob of Modge Podge, there will be a glob of glitter. We learned this lesson, but they still look really good when they're done).
Roll the Mason jar through the glitter, so that the jar is completely covered. Let it dry for about 30 minutes, and then spray it with the sealant, and Voila! Your new best home decor piece ever – and yes, everyone WILL be jealous and likely go home and make it themselves, so be prepared for lots of people to copy you.
Now, when I went home, I wanted to do something nice for Mr. Grumpy because he had a really rough day missing me for hours while I was with Robin. A few days ago, I stole Mr. Grumpy's beloved bananas and hid them in the freezer so that I could make banana bread. Everyone knows that when your bananas get just about TOO ripe, you put them in the freezer to save them for when you're ready for bread makin'. (My biggest sister Annie taught me that one!)
Well, Mr. Grumpy is kind of… attached to his bananas (too much?? OK get your head out of the gutter). And, when he found out that I had taken his bananas to the freezer and that they were lost to him forever, he was pretty upset. What was he to eat at lunch with his leftovers? (Try another fruit, Mr. G) Why would I do that to his bananas? (Because something even MORE awesome was coming) In fact, one day, he even came home from work with a banana and hid it from me so I wouldn't steal it. I still haven't found it, but I imagine that it'll start smelling soon.
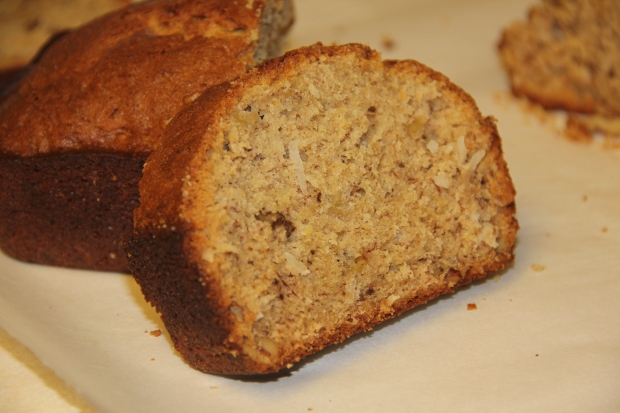
So, after a day of crafting, there was nothing I wanted to do more than make this amazing banana bread I found in Martha Stewart's Baking Handbook (I adapted her recipe for Banana Walnut Bread, and made an EVEN BETTER – yes, I know I just compared myself to Martha and said mine was better – Cari's Cinnamon Twisty Banana Walnut Bread.
Cari's Cinnamon Twisty Banana Walnut Bread
What You'll Need:
- 3 cups all-purpose flour
- 1 tsp baking soda
- 3/4 tsp salt
- 3 eggs
- 1 1/2 cups sugar
- 1/2 cup cinnamon sugar (I made mine from scratch – just add 2 parts sugar to 1 part cinnamon. I always keep a Mason jar of this handy. Goes great with toast… and in banana bread)
- 1 1/3 cups canola oil
- 2 tbsp vanilla extract
- 1 cup sweetened coconut shreds (like the ones I used for the coconut shrimp!)
- 4 ripe bananas, removed from their skins and mushed up (Sorry, Mr. G, but isn't the bread YUMMY? Wasn't it WORTH IT?)
- 1 cup walnuts (broken up by hand into small pieces)
- 2 tbsp buttermilk powder (or 1/2 cup buttermilk) … (I bought the powder kind that you get in the baking aisle. My friend Melissa introduced me and I'm obsessed!)
- 1/2 cup water (ONLY IF YOU USE THE POWDER BUTTERMILK)
Let's get cooking! First, preheat your oven to 350. Then, in a small bowl, combine flour, salt, buttermilk powder and baking soda. Set aside.
Next beat the egg, sugar, cinnamon sugar, oil and water – only use the water if you are using the powder buttermilk. Add in flour and combine with your mixer. Then, add in the vanilla extract, coconut, walnuts and bananas. Mix until combined nicely.
Spray 2 loaf pans with non-stick cooking spray (or use butter). Pour the batter into each loaf so each has the same amount. There should be about 1-2 inches of space left at the top of the pan, if you're using a 9X5" pan. Bake in the oven on the middle rack about 65-70 minutes. You'll know that it's done when it is a dark brown color, and you put a toothpick in it, and no batter comes out. I ended up baking mine for 67 minutes.
You can freeze one loaf for up to 3 months, or take it into work and impress all your coworkers. Or win over the man of your dreams by letting him eat a half loaf during dinner (ahem, Mr. G.). Yes, a half loaf is already gone… I'm not joking. This is why mine is better than M. Stewart's.


Cari Jeanne Steiner- BALL jar, not Mason. What happened to you, did you forget your roots? I won’t tell ds. This time. Criminy, you even pictured a Ball jar . I’m disappointed in ya CJ.
LikeLike